What Is The Right Laminate Flooring Covering For The Different Rooms

How to Care for Laminate Flooring

Laminate flooring looks better than ever with realistic wood grain and multiple style options, including stone and tile finishes. And although this flooring option is a durable one, it also requires regular care to keep it looking great. Since you can’t refinish laminate, you want to protect it from the beginning to make it last longer.

Clean the Floor Regularly

Basic laminate floor care starts with your cleaning routine. Any moisture, dirt or debris can dull the finish and leave the floor looking worn, so you want to keep it off the surface as much as possible. Start with basic sweeping or vacuuming on a daily basis or any time you notice dirt on the floor. It’s best to sweep along the lines of the floor to help loosen tiny debris that gets into the joints. If you use a vacuum, add an attachment meant for hard-surface floors without a rotating brush, which can cause tiny scratches in the laminate.

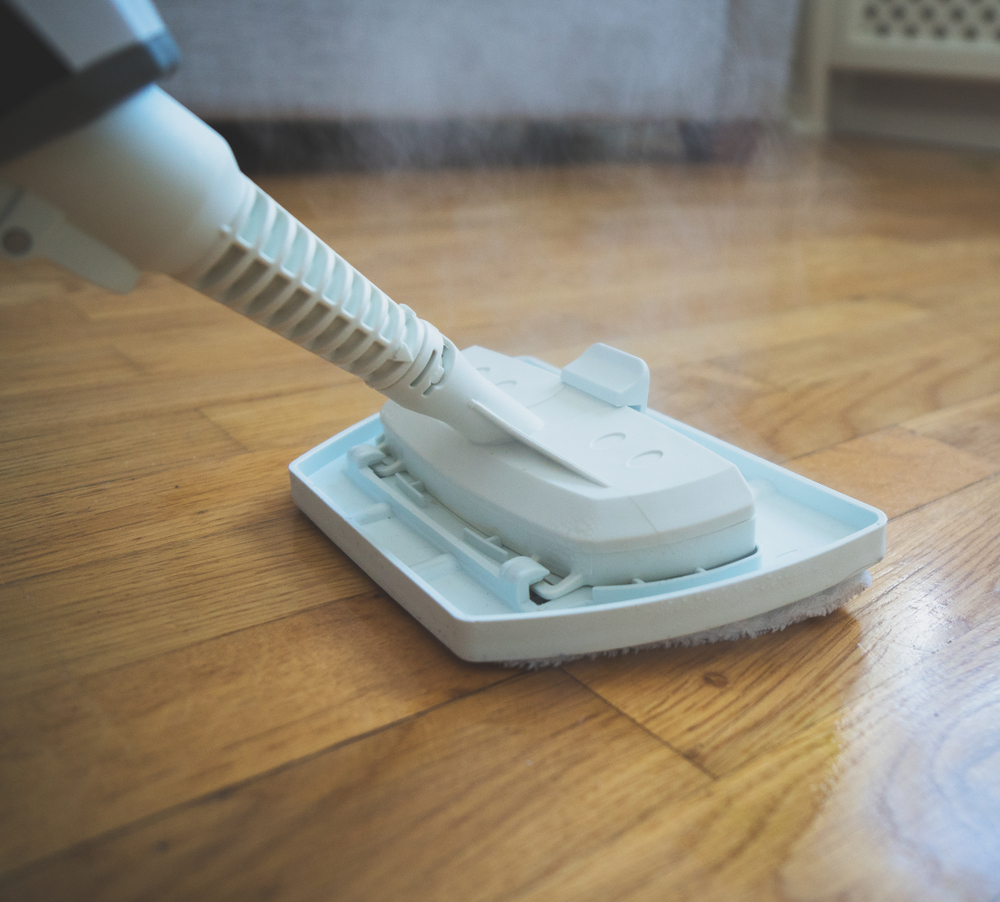
Even though laminate is strong overall, it can be easily damaged by water. That means you don’t want to swish a soaking wet mop over the surface or use a steam mop to clean it. You can spot clean the floor with a soft, damp cloth to minimize moisture exposure. If your floor needs an overall cleaning, use a soft mop that’s just damp instead of sopping wet. Wipe the floor with a microfiber cloth afterward to remove any remaining moisture.

Unless your floor is really dirty, you likely don’t need anything other than water to clean it. However, you can buy a floor cleaner designed for laminate flooring that should be safe to use. If you use any type of cleaning product, apply it to the mop instead of putting it directly on the floor to avoid damage and streaking. A small amount of vinegar can give your mop water a boost for extra cleaning power without damaging the laminate.

Handle Stains Properly

You’re bound to spill something on your laminate eventually, no matter how careful you are. Wiping up any spills immediately can prevent a stain from setting and cut down on the risk of moisture damage. But some stains require something more than just a soft cloth to remove.

Rubbing alcohol can safely remove several types of stains, including ink, crayon marks, nail polish and shoe polish. Window cleaner can help remove blood from laminate flooring. If you get grease or tar on the floor, use mineral spirits to lift the marks. Candle wax is easy to scrape off after it hardens, but you should only use a plastic knife or credit card for scraping. Never use metal. Chewing gum can be removed with a similar approach, but put a small bag of ice on the gum first to harden it.

Scuffs from shoes are common on any type of hard-surface floor, including laminate. The very shoes that make the marks may help remove them. Hold the shoe in your hand and lightly press the heel over the scuff mark as you twist and apply pressure. This trick works best with shoes that have light-colored soles. Tennis balls and erasers rubbed onto the scuff can also remove the mark.

Protect Your Laminate From Potential Damage

Give your laminate flooring the best chance possible of lasting by protecting it from common causes of damage. Furniture pads on the bottoms of furniture legs prevent scratching as the piece shifts. Rugs or mats on the busiest parts of the floor cut down on worn spots. It’s also a good idea to put down a mat near any exterior entrances to soak up moisture from shoes and keep dirt from getting on the laminate.

Avoiding certain cleaners and tools can also help prevent damage. Skip any harsh, abrasive or soap-based cleaners that might hurt the laminate surface. Bleach should never go onto laminate flooring. Avoid steel wool or any type of scrubber or sponge with an abrasive surface.

Polish and wax are also things to avoid with laminate flooring. It seems like waxing a laminate floor would restore its shine, but it can have the opposite effect, leaving your floor cloudy and dull. Wax can also cause build-up on the flooring.

Dos and Don’ts of Laminate Flooring

We all know that the flooring of an area plays a great role in deciding the appearance of the place. This is applicable for residential as well as commercial spaces. Among the different kinds of flooring materials that are popular with people, laminate flooring needs special mention. The most significant advantage of laminate floors is that they resemble the looks and style of hardwood floors, but they are way cheaper and come in wide varieties too. If laminate floors are maintained and cleaned properly, they keep on shining for years. Certain things have to be kept in mind when it comes to maintaining laminate flooring near me. In this article, we will discuss some of the dos and don’ts of laminate flooring:

  • Don’t Allow Stains to Settle on the Floor – Spills are not uncommon. But try handling the spills as soon as they happen. Take a clean cloth and wipe the spill immediately before it seeps and gets soaked by the flooring. Liquids can damage laminate floors and so, they should be avoided.
  • Read Cleaning Instructions of Laminate Flooring – When you purchase laminate flooring material, you will be given a manual with cleaning instructions by the manufacturer. There are specific recommendations by different brands, and these should be followed diligently to keep your laminate flooring in pristine condition.
  • Refrain from Using Excessive Water on Laminate Floors – For laminate flooring, traditional mopping methods are a strict no-no. There are chances that water might seep into the seams of the floor and cause damage like floor bubbling or swelling. Staining or fading of the flooring is bound to happen with too much use of water on such floors.
  • Mop Laminate Floors Carefully Once in Every Two Months – For preserving freshness of laminate floors, mop them once in every two months. Use damp mop on the floor as they are gentle. For regular mops, ensure that they are wrung thoroughly so that they are almost dry and then mop the laminate floor.
  • Refrain from Using Abrasive Tools – Scratching is a common problem with laminate floors. Therefore, abrasive tools like steel wool or sandpaper must be avoided on these floors. Use a dust mop or a soft-bristle broom for cleaning the floor. Avoid a rotating brush or a beater bar when using a vacuum cleaner, as that might lead to scratches on the surface.
  • Trim Nails of Your Pets – This is not a flooring tip directly, but it helps in maintaining laminate flooring. Pets like cats, dogs, and even birds have sharp nails and might scratch the laminate flooring with the nails. Trim the nails of your pets so that damage to the floor can be averted.
  • Choose Cleaning Products Specifically Made for Laminate Floors – When you are choosing cleaning products, make sure that you buy products that are specifically made for laminate floors. Using other kinds of products might leave residue or streaks on the floors, and cause damage to the floor as well.

How to Mop Laminate Floors

Glide a microfibre mop sprayed in laminate floor cleaning solution across your floor. If you don’t want to buy a solution, you can easily make your own which is equally effective. Simply combine 1 part vinegar and 3 parts water together. Add 1 teaspoon of washing up liquid and mix your concoction together before putting it in a spray bottle. As bizarre as it sounds to use vinegar on flooring, it’s actually a remarkable cleaning solution that can achieve shiny results.

Lightly dampen your mop by spraying on some solution, then tackle your flooring. Remember to drain your mop if it absorbs too much water, as you don’t want your flooring to get too wet. After cleaning, allow your flooring to dry. Open the windows and doors for extra ventilation to speed up the drying process.
What can go wrong when cleaning laminate?

As well as avoiding steam, it helps to prevent any dirt or damage to your laminate floor in the first place. If you haven’t already, invest in a doormat to stop dust and dirt travelling through to your new flooring. If you find your floor is prone to scratches, try putting furniture protectors underneath your chairs and tables. Last but not least, be quick to respond to any accidental spillages. Use a damp cloth to blot up spills as soon as they happen and your flooring should remain good as new.

After your laminate flooring is thoroughly cleaned, try to keep it in the best condition possible. It’s recommended that you do not use polish, varnish or wax on laminate flooring, as most types have a pre-finished wear layer which will never need further treatment.

Can You Use Steam On A Laminate Floor

Although the surface is water-resistant, laminate flooring has an inner core which is made up of high-density fibreboard. So while the odd spill is okay, excessive moisture could attack the inner core and damage your new flooring. But while a wet mop is a definite no, do steam cleaners have the same damaging effects?

Unfortunately, no. Laminate flooring is sensitive to heat and moisture, so the humidity from your steam mop can cause harm. It won’t cause as much damage as a wet mop, but could eventually cause your floor to warp, loosen or peel. Therefore, even if your steam mop says it will work on laminate floors, it’s best to stick to avoid steam altogether.

Things To Consider When Hiring An Event Planner

What to Ask an Event Planner Before Hiring Them

Hosting events is an excellent way to grow a business, particularly if the events run smoothly. As simple as that might sound, there is a wide variety of moving parts that must come together to create a strong event. If you don’t possess the skills necessary to plan, execute and manage an event, it’s quite likely that the event will turn out to be ineffective, or even worse, a disaster. Due to this, many companies decide to hire an event manager to create an innovative and groundbreaking event that will have people talking. Bringing in an outside event manager to plan and manage your company event can be a little bit of a gamble. However, sometimes it’s a necessary step to create something truly brilliant and make sure everything goes off without a hitch. Whomever you hire should have in-depth knowledge of your industry. You will want an event planner who truly knows what they are doing and can ensure that the event they create will be the best for your company. Here are questions to ask before you hire an event manager:

What Types Of Events Do They Usually Plan?

Do they have a specialty? Every event is different. There are significant differences between business events, trade shows, weddings, and fundraisers, just to name a few. Having detailed information on the events they have planned in the past will provide you with a better insight into their specific qualifications and if they can help you meet your event goals. Do your best to gauge their approach to event management as they run through previous events, their successes, and also the issues they have faced while planning events and how they overcame them. It’s also a great idea to interview candidates face to face and provide them with situations to see how they would handle it. This line of situational questioning can help you evaluate the way the person thinks, whether they are easily stressed and rush through things, or if they are calm and analytical and above all problem solvers.

What Specific Services Do They Offer?

Before you hire an event manager, it’s a good idea to find out what services they can offer you and your event. You want to be sure they can fully understand and handle the requirements you need to hold a fantastic event. Are you going to need them to find a venue? Will they have to organize catering? Is there a need for audio-visual technology? Should transportation be provided? Will you need extra staffing? What kind of production do you need? All of these questions are important topics to discuss with whichever professional you are leaning toward hiring. At the end of the day, it’s about the services they can provide to you and also about the services you need to make a great event.

How Do They Remain Up-To-Date With The Event Industry?

Staying relevant in any industry is the mark of a serious professional. Things change, new technology emerges, trends come and go. Remaining vigilant in staying current shows that an event planner wants to provide the best possible event for their client. Is the event manager affiliated with professional organizations? Do they regularly attend conferences on event planning? Do they hold any specific certifications that would add to their appeal? These questions might seem unimportant, but they could be helpful in determining the right professional.

What Type Of Events Do You Organise The Most?

Not all events are created equal and there are many different types. Knowing what events the planner has managed and worked before will give you a better insight into their qualifications to execute your event.

Will You Be My Day-To-Day Contact For The Event?

For smaller agencies you usually will work with the person you are meeting with, but for larger companies you can sometimes be assigned to someone else once the contract is signed. Part of the interview process is making sure that you have a good connection and feeling about whom you are working with, so be sure that you meet them!

What Services Are Included In Your Fee? Are There Any Additional Costs That I Should Expect?

While most planners are very upfront about all of their costs, sometimes services you assume are included are not. If you aren’t careful these little items, here and there, can quickly put you over your budget. Make sure that you discuss fee and services in detail upfront with your potential planner so that can avoid any surprises later.

Is There A Limit To The Number Of Calls And In Person Meetings We Can Have Prior To The Event?

If the planner does have a limit on these types of meetings, knowing the number will help you in your expectations and in your own planning. Make sure you know the cost of adding additional meetings so you can plan on either adding additional time up front or later on.

Do You Have Additional Staff That Work With You On The Day Of The Event Or Will This Be Something You Do By Yourself?

Depending on the size and needs of your event this is a particularly important question. Onsite during events a planner can get pulled in a million directions for all issues, large and small. For larger events or events that have many different pieces, an assistant or colleague will take some of this off of the planner and allow them to focus on the bigger aspects.

What Is the Projected Date and Location for Your Event?

This is perhaps the most basic of questions, but it is important for your client to provide a direct answer. It can be a bad sign if you sense a lot of indecision or conflict with this topic. Now, of course, some clients will need your help with choosing a venue, but they really should have at least a couple of places in mind. You can spend a significant amount of time shopping venues, and you’ll spend even more if the client has no idea what they want.

How Many Guests Are Attending?

The difference in cost between 200 and 500 attendees is massive, so if a prospective client gives you a wide-ranging count, then they likely have not done any research on costs. In this case, you’ll immediately want to proceed with the next question on the list.

What Is Your Budget per Person?

You may prefer to lead with a “per person” budget inquiry because it provides a better sense of how much thought the client has put into the event. Replies with blanket numbers like $5,000 or $20,000 are too distant from the guest experience. Whatever number your client uses to represent their budget, you should break it down into a per person rate so that both of you can see what you really have to work with.

What Are Three Things You Don’t Want at Your Event?

Although very similar to the previous question, adding the negative connotation can add significant insight for the planner. Say, for example, that the client is adamantly against serving chicken for dinner. A repercussion of this would be an increase in food costs. Without chicken as an option, you will need to consider beef or fish, both of which are typically more expensive. Understanding how a “no-no list” affects the big picture is a critical skill in assessing client compatibility.

Can You Provide Me With A List Of References And/Or Portfolio Of Past Events You Have Planned?

Every planner should have this available upon your request. If the planner is just starting out on their own they should still have a list of events that they have worked and planned for other companies or agencies. These references will help give you insight into how your planner has worked with clients in the past and what you can expect from them for your event.

What You Need to be an Event Planner

The most important person in every event is the event planner. As the brains of a very complicated show, the event planner needs to be a literal mastermind. Let’s take a look at a few essential skills event planners should have:

  • Impressive (Amazing) organizational skills
  • The ability to multitask
  • Good communication skills
  • Excellent management and delegation skills
  • Discipline and time management
  • Extreme attention to detail
  • Creative improvisational and effective problem-solving skills
  • The ability to work under very high pressure
  • Self-belief that you can become an event planner
  • This list may seem daunting – it’s definitely a very demanding job – but it’s also a very fulfilling role, and also one that prepares you for a lot of other stresses and situations in life.

Here’s another secret, it gets easier with experience. If you’re just starting out as an event planner, keep your first few events simple. Events are often like managing a theatre show with a pack of dogs as your stars. They usually know what they’re supposed to do, but sometimes the most unexpected problems crop up – one dog goes potty on stage, or another one gets distracted by a squirrel. After running a few shows, you’ll be able to better anticipate what problems might crop up, and prepare for it.

Important Tips For Long Distance Moving

LONG-DISTANCE MOVERS

In addition to our outstanding customer service reputation for local moves, we‘ve developed the same professional techniques for our expedited and Value long-distance moving services, and we strive to bring the same level of excellence to make your next long-distance move as stress-free and efficient as possible.

EXPEDITED LONG-DISTANCE MOVING SERVICES

With our expedited long-distance moves, you can expect a quick delivery time to your new home, often times with the same movers who moved the belongings out of your home. Unlike other long-distance carriers who cannot guarantee arrival times, we provide you with an exact date for arrival at your new location which means you can settle into your new home sooner, rather than later.

AFFORDABLE LONG-DISTANCE MOVING

This innovative service brings the convenience of moving with a professional moving company, at new and exciting cost-savings offered by few long-distance moving service companies around the country.

With excellent prices, outstanding customer care, and options that can suit almost every need and budget,

Essential Guide To Long-Distance Moving

While a local move is exhausting, long-distance moving is another animal altogether. If you have a long-distance move coming up in your future, we’ve compiled a guide to help make the process a bit smoother

Choosing Your Mover

With long-distance moving, it’s crucial that you select a great mover, but this can be tough, so here’s a quick list of tips that will help.

1. Check The Insurance – You should never select a mover that isn’t insured or won’t provide you with their insurance information. However, with long-distance moving, you also need to make sure the company is insured for interstate moves and insured in the starting point and ending point of the move. Also, be sure to select a company with an interstate moving license.

2. Get Multiple Quotes – It’s a good rule of thumb to ask for estimates from at least three moving companies. Ask for recommendations from your friends, co-workers or family members, or perhaps from a trusted real estate agent.

3. Meet With Representatives In Person – There’s just no way to truly judge the cost of a long-distance move until a moving company rep actually visits your home and takes a look at the scope of the move. If a company just wants to quote you over the phone, this is a bad sign. You could end up paying more than your estimate simply because the moving company didn’t fully understand every aspect of the move. You also need to discuss the move-in location with your rep, including discussion of the layout of the new home, such as the exact number of stairs or perhaps any parking issues or allowable moving hours, etc. The more information you can share, the more accurate your estimate will be.

4. Get Everything In Writing – You should receive a detailed estimate for the cost of the move. Read this contract carefully, and ensure that includes everything that you need moved and all of the services that you are paying for.

5. Don’t Pay Upfront – While a long-distance moving company might ask you for a small deposit; don’t pay 100% of the costs upfront or even a huge deposit. You shouldn’t pay until everything is off the truck at the new place. Also, don’t pay with cash, use a credit card and keep your contract with you at all times. If the mover at the new location tries to add on more fees, you can refer to the contract

Reducing Moving Costs

Long-distance moving is expensive, and it’s definitely going to cost thousands of dollars to complete this move, even if you are just moving out of a one-bedroom or two-bedroom apartment. Long-distance moving companies must pay for labor as well as transportation costs. The fuel alone needed for a long-distance move is a huge expense, which is one reason why these types of moves are so pricey.

But there are a few ways to reduce your costs, including:

1. Book Early – Start looking for moving companies as soon as you know you are going to move, even if you aren’t 100% sure about the destination address. You will know the general vicinity and that’s enough to start getting quotes. It’s always cheaper to book early and you also will have more control over moving dates and times.

2. Book Off-Season – Summer is the peak season for moving, and that’s typically because families don’t really want to move during the school year. However, if you are able to move after Labor Day or before Memorial Day weekend, you probably will qualify for some reduced rates. Keep in mind that wintertime moves could be subject to delays due to inclement weather, but those trucks are pretty tough.

3. Consider Flexible Move-Out & Move-In Dates – It’s always cheaper to move midweek than on the weekend. After all, everyone wants to move on the weekend, it’s just more convenient and you don’t have to miss work. However, if you can move on a Tuesday instead of a Friday or Saturday, you probably will save some cash, perhaps even several hundred dollars. Also, if you can move in to your new place midweek, this can reduce your costs further.

4. Reduce The Load – With long-distance moves, part of the cost is determined by weight. If you can avoid moving heavy items, by all means, do so. For instance, if your new place has a washer and dryer, sell your current models. Not only will you earn some extra cash, these heavy items won’t have to be moved, which can lower your moving costs.

5. Grab The Freebies – Packing materials are not cheap, but people often give them away for free after a move. When you see someone on social media offering free boxes or packing supplies, grab them up ASAP. You also can get free boxes from local stores, that don’t want to have to bother breaking them down and throwing them away. Boxes are expensive, but there are many places where you can get free ones, so start collecting them early and ask your friends and neighbors to save their newspapers to use for packing materials.

Reduce The Stress

1. Get Packing – As soon as you know you are moving, start packing. You can start by packing all your non-essentials, such as books, DVDs, knickknacks, off-season clothing and other items that you don’t need on a day-to-day basis and gradually work up to the more essential items. Make it a habit to pack a little bit each day so that you aren’t scrambling around at the last minute.

2. Keep Boxes Organized – Every box should be labeled. It should briefly list the contents and list where the box should be placed in the new home, i.e. Living Room, Kitchen, etc.

3. Be Colorful – We also highly recommend that you color code your boxes. You can use markers and colored packing tape. For kitchen items, you might use blue ink and blue packing tape, while the master bedroom items might be packed in boxes marked with red ink and red tape. When you get to the new home, you can tape a sign up on each door that displays the color of the boxes that are meant for that room. Even if the movers accidentally place a red box in the room designated for blue-marked boxes, you will be able to easily identify this box just by looking around the room.

4. Number Your Boxes – With long-distance moving, it’s quite possible that a box or two might go missing. This is because sometimes your items are taken off of the first truck, stored for a time and then placed onto another truck. If you number each of your boxes, you will be able to tell precisely which box is missing and what’s inside of the box. If you really want to get organized, we highly recommend that you create a spreadsheet listing each box and its specific contents. Yes, this does take a bit of extra time, but this extra level of organization can be helpful when unpacking or when searching for something important.

5. Opt For Packing Services – Of course, you also might want to hire your long-distance moving company to pack your belongings for you, and this definitely can reduce stress but it also can be expensive. However, if cost isn’t really an issue, you could leave all or some of the packing to the pros.

6. Pack Your Own Valuables – While a broken plate or a missing blanket might not spell disaster, if your grandmother’s priceless pearl necklace or your 14th century crematory urn is broken or missing, you are going to be upset. It’s a good idea for you to transport all of your own jewelry or any really precious or valuable items yourself. Obviously, if you will be flying to your final destination, you might have to make some tough choices about these items, but jewelry definitely should be packed in your purse or in carry-on luggage only. If you are driving, these valuable items are easier to tote, and if you need a bit more room, you can rent a small travel trailer or perhaps an overhead storage bin for your car so that you can carry certain valuables yourself.

7. Purge Your Belongings – Earlier, we talked about how purging big and heavy items can reduce your costs, but purging your belongings also can reduce your stress. Anything you don’t pack won’t have to be unpacked, so start giving away items to charity stores or hold a garage sale. This is the perfect time to reduce your clutter. Just grab some boxes and bins and label them “Give Away,” and start tossing stuff in.

8. Make A Huge To-Do List – With so much to do, it’s easy to forget a few items. Create a list that includes all of the utilities that need to be shut off or turned on, as well as all of the addresses you need to change. You also might need to order medical records, school records or change prescriptions to another pharmacy. You can organize this list by category or by due date, and make sure you keep your list with all of your other moving-related documents. Grab a file folder or expanding file and keep this in your kitchen so that you can access it at any time.

Long Distance Moving Blog

Step by Step Guide For A Long Distance Move

We understand how quickly overwhelming a long distance move can become. All of the planning, reducing the excess, making dozens of necessary arrangements and on top all that you have the packing- it’s a huge undertaking put together this comprehensive Step By Step Moving Guide. Starting from months prior and following all the way through to the delivery day. You can use this helpful resource to guide you through the moving process and stay on track for your long distance move.

Moving Organizer –  Secure a clear filing tote, paper organizer/divider and lock box to keep track of all important files, documents and items. Keep everything inside your tote. Other items to include in the tote are sticky labels, a roll of packing tape, pens and markers.

Labeling System – Create a labeling system; categorize items by room and use colored stickers or markers to streamline the labeling process.

Master List – Inventory your home’s belongings. Donate/Sell/Discard whatever you can before the move.

Floor Plan – Plan out where all your furniture will go in your new home. Sell or donate anything that does not fit into your new home’s floor plan.

Documents – Collect and file important documents such as birth certificates, passports, insurance cards, legal and financial documents.

Pets – Add your pets medical records and vaccination records to your Moving Organizer.

School – Notify schools about your move and change of address. Request a copy of Academic Records. Start your search for a new school, begin the enrollment process and have academic records transferred. Add Academic Records to your Moving Organizer.

Career – Notify your work to take off if necessary.

Finishing Work – Make arrangements to complete any carpentry, wall painting, electrical, or plumbing work required at your existing and/or new residence. 

Travel Arrangements – Book plane tickets, hotel reservations and car rentals if required.

Freezer & Pantry – Consume your pantry and frozen items in efforts to reduce food waste during your move.

Bank – Update billing address, arrange for transfer of safety deposit box if needed.

Insurance – Contact your home insurance agent to review policy details, update policy or obtain additional coverage if needed.

Government – Alert DMV, IRS of address change.

Subscriptions – Update your address with any existing magazine or newspaper subscriptions.

Memberships – Update your address with any club store accounts.

Curbside & Virtual Yard Sale – Use the sidewalk, front yard, internet, eBay, facebook marketplace for selling unwanted items.

Get Organized! – Update your master list to create an inventory sheet where you can track items during the move.

Special Arrangements – Make any required special arrangements such as childcare and pet care.

Travel Arrangements – Confirm flights and/or update hotel reservations and car rentals if needed.

Packing Materials – *Begin to acquire all necessary packing materials.

The Best Long-Distance Moving Companies

Do you need to find one of the best moving companies? Are you going to be relocating across the country? Maybe you have just found out you’ll be transferred due to your job?

Making a long-distance move or even just to a neighboring state can involve more complications and expense than a local move where you rent your own moving truck. There will be more stress and more to think about to avoid problems. Despite this, a lot of people choose to try and do everything themselves.

This is understandable, as the costs involved in hiring moving companies can be significant. Though the task of moving over a longer distance is going to be more difficult than people might imagine. It can be a daunting task to face after dealing with the selling process, and this is why using the best movers is a better option for many people.

You should be able to put your trust in your moving company, you don’t want to lose your precious possessions and valuables. They should be reputable and provide an excellent moving experience. The movers we’ve selected have good customer feedback, industry awards, and have been in business for a long time.

offers long-distance moves across the country as well as internationally. They let you quickly assess the approximate cost of moving with them through their online calculator. Discounts on moving supplies are available through the company as well

Long Distance Moving

Long distance moving is much more complicated than local relocation for obvious reasons. Every relocation is different, but moving long-distance adds a lot more to the mix. Therefore, you will need some help pulling it off. You can fully rely on us to match you with a moving company that meets all your criteria

Long distance moving doesn’t have to be hard

Moving requires a lot of planning, budgeting, patience and time – but with the assistance of a professional mover, it can get much simpler. The question is – how to find the right moving company? Easy. With our help! Let us guide you through this whole process – from its beginning to its end.

Who are we and what do we offer

We are a company that collected reviews, feedbacks, comments, and useful information about moving companies and put them together in our database. Over the course of years, we gathered more and more information, making our search results far more precise and professional.

What is the long distance moving and how does it work

There is a great difference between local intrastate and interstate moving companies and process. Long distance moving companies form their estimates on a few things:

A number of items you are moving

Size, density, and weight of the items

The distance they will travel

Any special requests

Local Divorce Lawyer

Do I Need an Attorney for My Divorce?

Many couples debate whether they need a divorce attorney when mediation is required by the courts. The attorneys at the Roberts Family Law Firm recommend, at minimum, consulting with an attorney about your options and what is best for your case no matter how well you and your ex-spouse get along. Here are a few examples to consider if you are debating whether you should hire an attorney for your divorce.

  • If you have many complicated assets to divide up. If you’ve accumulated various expensive marital property, you should consider hiring a lawyer. You will want to have a lawyer present if you have complicated possessions you are dividing, like businesses, numerous vehicles, and real property.
  • If your spouse is prone to lying. If your former spouse is known to lie, it could become difficult when it is your word versus theirs in a hearing or mediation session. If they are spreading false information about you, or lying in the courtroom, you need a lawyer on your side to protect your interests.
  • If violence or abuse is ever involved. If any abuse is present, whether it’s related to children, substance abuse, sexual abuse, mental abuse, or any other form, you should always hire an attorney. Not only will the abused spouse not be able to negotiate properly for fear of manipulation or further abuse, but an attorney can help take the appropriate steps to protect you and your family.
  • If your spouse has hired an attorney. Your spouse may choose to hire a lawyer to represent themselves at the last minute. We see attorneys appear at hearings and mediations with little to no notice to the unrepresented spouse. If your spouse decides to have representation, you should as well. It will be difficult to make your case against a family law attorney, even if you believe you have a clear and reasonable argument.

When You May Need a Divorce Lawyer

There are certain situations when hiring a divorce lawyer makes sense, and you should probably do it. You should probably hire an attorney if:

  • There’s a problem with abuse
  • You think your spouse is lying about certain issues or being vindictive
  • Your spouse has retained an attorney
  • Your divorce involves children or complicated financial issues

If you’re not financially able to hire a divorce lawyer, you should contact your local legal aid office or a local bar association. You may be able to qualify to get free or reduced costs of legal representation. If you do not qualify, you may still be able to ask questions of an attorney throughout your divorce proceeding.

Reasons That You Need a Divorce Attorney

While a do-it-yourself divorce may be acceptable in some situations, but most people should consider hiring an attorney to represent his or her interests. Here are five reasons that a person should consider hiring an attorney during a divorce proceeding.

If you are seeking a divorce, you may be tempted to file for divorce on your own using court provided documents or information from a book or website. While a do-it-yourself divorce may be acceptable in some situations, most people should consider hiring an attorney to represent their interests. Here are five reasons that a person should consider hiring an attorney during a divorce proceeding.

Expert Advice

An experienced attorney can help a person to make certain to receive everything that he or she deserves during a divorce. State laws do not necessarily support an even split of assets depending on the couple’s situation. In many cases, a spouse is even entitled to retirement or other income that the other spouse will receive in the future. If your marriage has any complicated issues to settle, an attorney can be an invaluable resource. For example, if there is child custody and support issues, substantial income, debts, assets or future assets (an inheritance, etc.) then you should hire an attorney to protect your interests in a divorce.

Reduce Stress

Divorce is a stressful time for everyone involved. Hiring an attorney to complete a divorce is one way to reduce the stress of the divorce. While the attorney will need to gather information from you, he or she will take care of almost everything else, allowing you more time to take care of yourself and your family. You have enough things to worry about when you are getting divorced, let an attorney take care of the legal work.

Avoid Mistakes

There are two primary reasons that people make mistakes when completing their own divorce: the legal system is complicated and the stress of the divorce makes it difficult to think clearly. If you simply forget to address an issue such as medical or credit card debt or if you underestimate or overestimate the value of an asset, you can make a significant mistake in a divorce proceeding. Such a mistake may cause financial harm or will require future legal proceedings to correct. By hiring an attorney, you can rest assured that you case is being properly handled the first time and that you are avoiding costly mistakes that you might regret for the rest of your life.

Clear and Binding Agreement

Though a court will review any divorce documents that you present, the court may not understand what you are trying to do on each point of the divorce. This may result in a divorce decree that states something other than what you intended. By using an attorney, you can be certain that the legal documents presented to the court will accurately state your wishes and that the divorce decree will be free of errors or unclear language that may make parts of the agreement difficult or impossible to enforce.

You are unfamiliar with matrimonial law and/or family court

In court, self-represented litigants are not given any special treatment; judges hold them to the same standards as the lawyer for the other side. Most judges are fairly patient people, but if you don’t know the law – or what documents you need, or even what to do next – you may be pushing the judge’s patience past the breaking point. The more annoyed a judge is, the less sympathetic he/she is likely to be. Family lawyers are experts in knowing what to say to make their case seem more reasonable than yours. Lawyers who focus on areas outside family law hire a family lawyer when they’re getting a divorce; they recognize that they’ll be out of their depth when faced with a lawyer who practices family law exclusively. So it’s extremely unlikely that you’ll be able to adequately prepare to face the court process – and your spouse’s lawyer – by yourself. To make matters worse, you can jeopardize your entire case by saying or doing just one thing wrong.

Legal knowledge and support.

Divorce attorneys are professionals who understand divorce laws and what you are entitled to receive by law. To get the most beneficial terms possible out of your divorce (including child support, asset division, and child custody), work with a competent divorce lawyer.

Avoiding Delays

Though a person may use court provided documents to file for divorce, there can still be problems with completing the proper forms and providing adequate information and documentation. A person who goes to court without legal counsel may find that problems with the paperwork or other issues may result in a delay in the court’s ruling. This may substantially delay the date that the divorce is final. By hiring an attorney, a person can avoid paperwork or other problems that could cause a delay and get the divorce completed as quickly as possible.

Posted inLegal

Why Are Household Electrical Wiring Color Coded

House Wiring Diagrams and Project Guides

Wiring Diagrams for Light Switches- Numerous diagrams for light switches including: switch loop, dimmer, switched receptacles, a switch combo device, two light switches in one box and more.

Wiring Diagrams for Receptacle Wall Outlets- Diagrams for all types of household electrical outlets including: duplex, GFCI, 15, 20, 30, and 50amp receptacles.

Wiring Diagrams for 3-Way Switches- Diagrams for 3-way switch circuits including: with the light at the beginning, middle, and end, a 3-way dimmer, multiple lights, controlling a receptacle, and troubleshooting tips.

4 Way Switch Wiring Diagrams- Diagrams for 4-way switch circuits including: various source and light locations, dimmer for a 4-way circuits, wiring for 4 locations, and troubleshooting tips.

3 Way and 4 Way Switches to Control Multiple Lights- Diagrams for wiring to control multiple light fixtures with 3 and 4-way switches.

Wiring Diagrams for a Fan/Light Kit- Diagrams include: using a light switch to control both the fan and light, separate light dimmer and fan speed controls, light dimmer and pull chain fan, and an exhaust fan switch and timer.

Wiring Diagrams for Multiple Receptacles- Diagrams for wiring multiple receptacles including circuits for duplex receptacles and ground fault interrupters.

Guide to Electrical Wiring in your House

Electrical Wiring inside a house can seem like a very inexplicable thing. Wiring inside a newly constructed building can be easily installed. However, proper supervision must be taken to ensure that the wiring system is carefully established. This is a comprehensive guide to help homebuyers understand how wiring works inside a building

An “Electrical wire” refers to a material that channels electricity from a power source to electrical appliances inside a building such as the lights, fans, kitchen appliances, etc. Generally, large wire cables bring electricity into a structure and smaller wires distribute it evenly to all electrical plug points inside the building.

Defects in Electrical Wiring

The quality of electrical products plays a major role regardless of whether it is for sockets, fittings or switches. Faulty material or improper fitting can cause sparks which can be dangerous and liable to ignition.  Some of the defects in electrical circuits are:

Short circuit: A short circuit is the result of extremely low resistance between two conductors that supply the electricity in the path of the circuit. This ends up in excessive current flowing through and can cause the main power supply to be impaired. In such situations, the fuse is blown out. Improper insulation and loose wiring are causes for short circuit.

The human body is a good conductor of electricity. A single electric shock caused by faulty wiring can prove fatal and hence, certain measures must be taken to ensure that the safety of human beings is maintained. One of the first steps to ensure human safety is earthing the AC supply system of the building. There is a sufficient supply of earthing and all electrical gadgets and circuits should have an earth wire as it is necessary to null leakages in the circuit and prevent electric shocks.

Beginners Guide to Electrical Terminology

If you’re new to the industry, the language used can appear quite daunting at first. This guide looks at some key terms and phrases that you’ll be learning about and using during your electrical training with us

able – A cable is made up of one or more conductors and their insulated surrounding

Twin and Earth (1) – This is the most common cable used in domestic electrical installations, it is a flat grey thermo-plastic sheathed cable. Inside, it has two single conductors of the same size that are both separately insulated, one is brown in colour denoting its intended use as the line conductor, and the other is blue, denoting its intended use as the neutral conductor. A third un-insulated conductor sits between the two and this is used as the Circuit Protective Conductor or ‘earth’ as it is commonly known.

Flex (2) – A flexible cable that has a soft rubber or thermoplastic outer sheath and individually insulated conductors inside it. Each individual conductor is made up of very fine strands of copper to allow the cable to repeatedly flex.

SWA (3) – Steel Wire Armour, this is a cable that is surrounded by a layer of armour made up of steel wire, it is generally used where the cable requires a high degree of protection.

LSHF (4) – Low Smoke Halogen Free cable is a cable with a particular type of insulation that is designed so that it emits a small amount of smoke and zero halogen when exposed to fire or heat.

‘Singles’ (5) –  A colloquial term used for when a cable is a self contained single conductor, can refer to any cable that is singular, however in a domestic setting PVC insulated singles are often what is mean by the use of the term.  

Units of measurement

Ohms – An Ohm is the electrical unit used for measuring resistance, its symbol is Ω.

Watt – This is a unit of power and is denoted by use of the letter W.

Voltage – Voltage is the difference in electrical potential between two different points, it can be thought of as electrical pressure, and it is denoted by the letter V or U.

Amperes – This is the term used to describe the flow of electrical current, it is denoted by the letter A.

AC- Alternating Current is an electric current which reverses direction periodically. AC current is the way that electricity is distributed through the power network in the UK.

DC – Direct Current is an electric current that travels in only one direction, this is the type of current that a battery produces.

Circuit breaker (1) – A type of protective device for circuits, it will protect a circuit from overload and fault currents.

Fuse (2) – A fuse is a protective device. They are designed so that when more current is drawn through them than they are designed to take, a part of it melts, causing the circuit to become open and the electricity supply to become disconnected.

RCD – Residual Current Device, this is a type of device used to disconnect the electrical supply to a circuit, or bank of circuits in the event of a fault from line to earth. It does this by essentially monitoring the line and neutral currents. If there was a fault between line and earth, the RCD would trip as there would be no current on the neutral conductor.

There are three commonly encountered types:

RCCB (3) – Residual Current Circuit Breaker, what most people commonly refer to as an ‘RCD’, will often be found in a consumer unit protecting a bank of circuits.

RCBO (4) – Residual Current Circuit Breaker with Overload protection, this combines the function of an RCD and a circuit breaker in one device and can be found protecting one circuit.

SRCD – Socket Residual Current Device, as the name suggests this type of RCD is integral to a socket outlet.

Electrical Wiring Guide

In order to wire your own home, you must comply with the requirements of the 2020 edition of the National Electrical Code (NEC). The NEC is not intended as a design specification nor an instruction manual for untrained persons, its purpose is the practical safeguarding of persons and property from hazards arising from the use of electricity and addresses fundamental safety principles.

Electrical wiring

Electrical wiring is an electrical installation of cabling and associated devices such as switches, distribution boards, sockets, and light fittings in a structure. Wiring is subject to safety standards for design and installation. Allowable wire and cable types and sizes are specified according to the circuit operating voltage and electric current capability, with further restrictions on the environmental conditions, such as ambient temperature range, moisture levels, and exposure to sunlight and chemicals.

Associated circuit protection, control and distribution devices within a building’s wiring system are subject to voltage, current and functional specification. Wiring safety codes vary by locality, country or region. The International Electrotechnical Commission (IEC) is attempting to harmonise wiring standards amongst member countries, but significant variations in design and installation requirements still exist.

Wiring installation codes and regulations are intended to protect people and property from electrical shock and fire hazards. They are usually based on a model code (with or without local amendments) produced by a national or international standards organisation, such as the IEC.

commonly known as the “wiring rules”, specifies requirements for the selection and installation of electrical equipment, and the design and testing of such installations

attempt has been made to harmonise national wiring standards in an IEC standard, IEC 60364 Electrical Installations for Buildings. Hence national standards follow an identical system of sections and chapters. However, this standard is not written in such language that it can readily be adopted as a national wiring code. Neither is it designed for field use by electrical tradesmen and inspectors for testing compliance with national wiring standards. By contrast, national codes, such as the NEC or CSA C22.1, generally exemplify the common objectives of IEC 60364, but provide specific rules in a form that allows for guidance of those installing and inspecting electrical systems.

Colour coding of wiring by region

In a typical electrical code, some colour-coding of wires is mandatory. Many local rules and exceptions exist per country, state or region. Older installations vary in colour codes, and colours may fade with insulation exposure to heat, light and aging.

Materials for wiring interior electrical systems in buildings vary depending on:

Intended use and amount of power demand on the circuit

Type of occupancy and size of the building

National and local regulations

Environment in which the wiring must operate.

Wiring systems in a single family home or duplex, for example, are simple, with relatively low power requirements, infrequent changes to the building structure and layout, usually with dry, moderate temperature and non-corrosive environmental conditions. In a light commercial environment, more frequent wiring changes can be expected, large apparatus may be installed and special conditions of heat or moisture may apply. Heavy industries have more demanding wiring requirements, such as very large currents and higher voltages, frequent changes of equipment layout, corrosive, or wet or explosive atmospheres. In facilities that handle flammable gases or liquids, special rules may govern the installation and wiring of electrical equipment in hazardous areas.

Should They Attend Your Home Inspection

DIY Home Inspection Checklist

I am NOT suggesting that you forego a professional home inspection from a licensed home inspector. Unless you ARE a professional home inspector, you should absolutely hire one after you’ve performed this checklist and your contract has been accepted.

Why?

Because a home inspection runs between $500 and $1,000. Not the end of the world — and certainly worth it on a home you really want. But it’s silly to drop that cash on a home inspection only to discover deal-breaker items you could have found on your own.

So this checklist is for you to go over once you’ve decided you like the house and want to make an offer. You don’t need special tools or training — you just need eyeballs, a notebook and pen, and a marble. If you’re feeling ambitious, take a tape measure.

General

Windows: Check that they open and close easily. Any broken panes?

Doors: Check that they open and close completely. Do they stick? Lock? Scrape the floor at any point?

Floors: Any creaking? Obvious unevenness? Place a marble on the floor and see if it rolls to check for slant. (Do the marble test in multiple locations in the house.)

Walls: Any holes?

Trim: Any damage or missing pieces? Animals can be brutal to wood trim, and matching old trim is almost impossible.

Lights: Turn on every light switch to make sure they work. (Note: If the home is unoccupied and the power is turned off, this won’t be possible.)

Stairs: Walk up and down the stairs and touch every spindle on the railing. Do they seem sturdy or wobbly? Do the stairs creak? Are any parts missing?

Outlets: Get a voltage tester at your local big box home improvement store for less than $20 and test every single outlet.

Furnace: Look at the furnace. Are there any stickers that indicate installation date?

Water Heater: Check for water around the base of the water heater. Any stickers on this to indicate installation date?

Kitchen

Cabinets/Drawers: Open every cabinet and drawer, then close again. Do they move smoothly? Does anything prevent any of the doors or drawers from easy use?

Oven: Open and inspect the oven. Does the door open slowly, indicating the springs still work? What is the condition of the oven? Turn on the oven to make sure it works.

Stove: Turn on each burner on the stove. If gas, turn on and turn off before turning the next one on to make sure they all turn on by themselves, rather than catching the flame from an adjacent burner. If they all work individually, turn them all on to make sure they all work at the same time. If electric, just turn them all on.

Fridge: Open the refrigerator/freezer doors. Do they open easily? Note: Do NOT do this if the home is vacant and appears to have been vacant for some time. Trust me on this one. Assume it must be replaced.

Dishwasher: Open and inspect the dishwasher. Do the springs work on the dishwasher door?

Faucet: Run the water in the sink. How is the pressure?

Garbage Disposal: Does the garbage disposal run? (Don’t forget to turn on the water before you test it.)

Cabinet Interiors: Take a good look at the cabinets. Is there adequate storage? Do you have enough drawers? (I once bought a condo that had one drawer in the kitchen. Sigh.)

Microwave: Open up the microwave and take a peek inside. Turn it on to see if it works — but don’t let it run for very long. That’s not good.

Hood: Turn on the range hood fan and light to make sure they work. Peek underneath to check for filth — this is a commonly overlooked area for cleaning.

Stone Countertops: Look at the stone countertop and check for chips and cracks.

Formica Countertops: Check the Formica countertop for chips.

Tile: Check the floor for cracked tiles.

Windows: Open and close all windows.

Home Inspection Electrical Guide Program

Electricity has been a permanent feature in residential occupancies for over 100 years, and it was known to be a cause of fires since the earliest days of its use. I have personally spent many hours sifting through debris after a fire, and I have witnessed homeowners who experienced an electrical fire firsthand in their homes.

This book was NOT written as a step by step guide of how to make a total electrical inspection, but rather as a guide to make certain the Home Inspector is not overlooking the critical areas that have started fires and caused accidents.

Why is fixed wiring the leading cause of a residential electrical fire? This book will not only take you to the causes, but also show the solutions of preventing an electrical fire before it starts with a proper electrical inspection of the home. It’s your moral obligation to provide the upmost in electrical safety to the homeowner.

Experienced investigators uniformly cite high-resistance connections as the most common electrical cause of fires. It has been estimated that 90% of electrical failures occur at connections. Loose wire connections at the receptacle outlets and switches are a common reason for an electrical fire in a residence.

Recent studies have shown that the frequency of fires in residential electrical systems is disproportionately higher in older homes. Three factors that could influence the likelihood of a residential electrical fire are; 1) the effects of natural aging over time on the electrical system wiring and equipment, 2) misuse or abuse of the electrical system components in the home by occupants, and 3) non-Code compliant installations, upgrades, or repairs.

Home Inspections

Home Inspections are an integral part of nearly every residential real estate transaction and knowing what to expect and how to deal with the results, from both the buying and selling side, can mean the difference between having a great experience and a frustrating (and potentially expensive) one.

there are licensing standards in many areas and even in unlicensed areas, there are several trade groups that do a great job of establishing minimum standards, but these standards fall short of truly protecting buyers from the unknown – these standards are really meant to reduce an inspector’s liability and that is not what you want as a home buyer

With that being said, there’s only one certification in the industry that requires inspectors to provide a 100% satisfaction guarantee, an inspection that goes beyond minimum standards providing true protection for buyers and sellers alike, and quality service that is continuously monitored by a third party; that would be the Certified Inspection Expert.

For example, if you move in and discover that a pipe is leaking under a sink, what do you do?  This guide will show you how to get that repair done for free – just by choosing the right home inspector. 

In fact, this website will explain how to be covered against literally hundreds of potential failures at no cost to you – giving buyers true peace of mind while in many regards reducing liability for a seller as well – and it is something that is offered by the leading home inspection companies

Home Inspection

Home Inspection provides you with the ‘information’ you need to make an informed decision about the property being inspected in a clear, concise, and professional manner. We deliver an oral report on site and a detailed, electronic report to all customers following the inspection.

Now that you’ve found a home that you love and want to buy, here’s a thought: Let your head take over for your heart. Make certain this is really the wonderful place it appears to be. The last thing you want is to move into a home unaware of existing or potential problems. Problems that could be costly to repair or, worse, beyond repair.

are impartial and work exclusively for you. Our sole job is to provide you with a comprehensive, fair, independent, objective evaluation so that you know as much as possible about your valuable new investment. You don’t want any surprises when you move in.

take our time poking through a home’s structure and systems… an exploration that’s an invaluable learning and discovery experience for you as well. That’s why we wholeheartedly encourage you to accompany us during the 2-3 hour inspection. This will allow your inspector to answer questions and explain the significance of his observations

We want you to go through the house with us so that we may inform you of any deficiencies or concerns, discuss “how things work”, and also share with you what needs to be maintained and why.  This is why we say “Not just a Home Inspection… A Home Instruction!”  Don’t worry, we are a ‘jargon-free’ company and we will explain everything in terms you can understand.

HOME INSPECTIONS

Home Inspections provide a wide range of home inspection services. Home Inspections believe it’s essential to fully understand all parts of a property before purchasing. Because of this, Home Inspections provide in-depth presentations contains both our findings from the inspection and helpful maintenance tips going forward.

has specific requirements for home inspections and we take pride in adhereing to every recommendaiton they make to provide the best home inspeciton possible.

owned and operated by firefighters and have a deep commitment to helping our communities. Our inspectors are highly trained and held to the highest standards

Home Inspections exceed the continuing education requirements so we can stay up to date on changing building standards. Home Inspections provide inspections for older homes and new builds.

Home Inspections can help ensure structural integrity. Home Inspections know that the the home buying process is stressful, so we’re here to help guide you through the pre-purchase inspection. We’ll make it easy and give you peace of mind

How To Become An Income Tax Preparation

Tips for hiring a tax preparer

Thinking of hiring a tax preparer to file your income tax return? Before you decide, consider all the Tax Department has to offer to ease the filing process:

  • free electronic filing options;
  • free tax assistance sites statewide where department volunteers can help walk you through the electronic preparation and filing process; and
  • income tax forms that perform basic math to help reduce errors on your return. You can fill in these forms online and then print them out for your records.

If you do decide to hire a tax preparer, ask the four simple questions below to ensure the preparer you hire is, as most are, honest and in compliance with the tax law. Don’t fall prey to a tax preparer scam.

While taxes may seem difficult, you don’t want just anybody who advertises tax filing to prepare your return. Unfortunately, the tax preparation industry isn’t regulated, and some tax businesses are run by untrained or dishonest people.

You may be tempted to go to businesses that are known to generate large tax refunds. However, be careful and make sure that the tax return is prepared accurately. Ultimately, you (as the tax filer) are held responsible if there are errors or negligence associated with the return.

Luckily, there are steps you can take to ensure that your tax return is accurately prepared by a trained and experienced tax preparer.

Are you registered with the IRS and New York State?

Tax preparers registered in New York State must meet continuing education requirements and minimum qualifications. Attorneys, certified public accountants, and IRS enrolled agents don’t need to register, but do have other professional requirements.  

Ask to see the preparer’s registration certificate or proof that they aren’t required to register. You can also see Verify your tax preparer to search for your tax preparer in an online database of authorized preparers.

How much will your services cost?

Ask to see a list of fees. Fees should be directly related to the services provided—not the refund amount. Also, by law, preparers may not charge you extra for electronically filing your New York State return.

How will I receive my refund  

Your refund should never be deposited into your preparer’s bank account. The fastest and safest way to receive your refund is to have it directly deposited into your bank account. However, the Tax Department can also mail you a refund check.

Check the preparer’s qualifications.

Unfortunately, there are no regulations for paid tax preparers, so you need to do your own research and take precautions. Make sure your tax preparer has a Preparer Tax Identification Number (PTIN). A PTIN is required for tax preparers who charge for their services and indicates that the preparer has registered with the IRS. The IRS has a directory where you can verify PTINs and credentials.

Ask about their training. At the minimum, make sure that they have passed a state or federal tax certification exam. The IRS has a guide to understanding tax preparer credentials and qualifications that can help you in finding the right preparer.

Choose a tax preparer who can be contacted later.

If the IRS has questions about the tax return, make sure there is someone to contact for follow-up. Check out the preparer’s reputation with others in the community and get the preparer’s address and telephone number.

Do not leave original documents with the tax preparer.

If the tax preparer needs to work on your return when you are not present, make sure they have scanned or copied the necessary information. Always take your original documents with you.

Insist that the commercial tax preparer sign the tax return in pen.

This is required by federal law. The preparer’s address and Preparer Tax Identification Number (PTIN) are also required on the tax return.

Consider tax preparation software.

If you’re technically savvy, tax preparation software is probably a cheaper and more reliable option than a tax preparer, too. Quite often, tax preparers merely use some tax preparation software package to file your taxes for you anyway, so if you’re not afraid of installing a software package and typing in the numbers yourself, you should just use a package like TurboTax. The software essentially walks you through a questionnaire, telling you where to find all the answers that you need, then fills out the tax forms correctly as you type in the numbers. Again, if your tax situation is relatively simple – typical W-2s and 1099s and no complex business arrangements – filing it yourself with the aid of software that makes it easy is probably a better choice.

The time to call in a tax preparer is when things are a bit more complicated, such as when you’ve bought and sold a number of investments or have business holdings or business income, or if you’ve received money from a trust or other atypical sources. While software can still guide you through these situations, it doesn’t always find the best way to organize them and file them, and the eye of a knowledgeable tax preparer can really make the difference here.

Search for free tax programs.

There are several free government programs that prepare taxes free of charge if you meet an income requirement; go to the IRS’s Free File page for more information. Most will also file your state return as well. If not, check with your state’s Department of Revenue to find out about their programs.

New tax laws can create confusion that dishonest preparers will capitalize on, so taxpayers should always review their return before signing and ask questions on entries they do not understand. Also be sure to get a copy of the return for your records. Finally, do not ever sign a blank tax form or one filled out in pencil!

What Licenses and Certifications Do Tax Preparers Need?

Technically, tax preparers only need a PTIN (Preparer Tax Identification Number) from the IRS in order to legally prepare taxes. However, the IRS encourages taxpayers to choose well-qualified tax preparers, so many tax professionals choose to pursue some of the additional education and credentials listed below.

Different Types of Tax Preparers

Enrolled Agents (EA)

Enrolled Agent status is the highest credential awarded by the IRS to professional tax preparers. These tax professionals must pass a three-part exam and pursue continuing education each year in order to maintain their certification.

Certified Public Accountants (CPA)

CPAs are among the highest credentialed tax professionals. CPA requirements vary slightly by state but most require a bachelor’s degree, some graduate-level education, two years of professional experience, and a rigorous four-part exam.

Note that not all CPAs work as tax professionals.

Other Tax Preparers and Annual Filing Season Program Participants (AFSP)

Non-credentialed tax preparers can still pursue education through the AFSP. This optional program was created by the IRS and  “aims to recognize the efforts of non-credentialed return preparers who aspire to a higher level of professionalism.” Participants must obtain 18 hours of continuing education, including a 6 hour Annual Federal Tax Refresher course.

Pediatric Integrative Medicine

Tips for Finding the Best Pediatric Dentist for Your Child

While you may not actually enjoy going to the dentist, scheduling regular visits is a key aspect of maintaining good oral and dental health. As a dentist, I know that there are several factors that can improve your overall experience at the dentist’s office, and finding a dentist you like and trust is perhaps the most important.

This is especially true for kids, who may suffer from childhood dental anxiety and need a pediatric dentist who can calm their fears.

Not sure how to find the best children’s dentist for your child? I’m going to walk you through the entire process in this article.

With this information, along with a little research into dentists in your local area, as well as consistent, positive reinforcement, your child may begin to actually look forward to his dental visits!

What’s the difference between pediatric and adult dentistry?

All dentists are doctors of oral health. However, pediatric dentists earn a specialization in children’s dentistry by completing an additional 2-3 years of schooling beyond the standard undergraduate degree and four years of dental school required for all dentists.

This additional training focuses on child development and the dental needs of infants and children, which distinguishes pediatric dentists from their colleagues who only see adult patients.

Some of the specific areas of focus of children’s dentistry include:

Preventive and invasive oral care of children: Pediatric dentists learn how to recognize tongue thrust, tongue ties, baby bottle tooth decay, enamel hypoplasia, and other conditions that only affect children.

Developmental and growth issues, related to the mouth, jaw, face and head: Baby teeth are very different from adult teeth, and pediatric dentists must learn how to handle different eruption patterns and the many stages of oral development that infants, toddlers, and children move through.

Treatment of children under anesthesia and sedation by dental sedation services. A good pediatric dentist will emphasize the importance of nose breathing (as opposed to mouth breathing). Learning this key function won’t just improve the experience of a child’s dental visit, but it will also improve sleep and overall health.

Treatment of medically compromised and special needs children, including focus on child psychology: Children with special needs require special dental care, and a pediatric dentist can work with parents to ensure that their child establishes the proper foundation for long-term oral and dental health.

Pediatric dentistry focuses on treatment of babies in the beginning stages of tooth formation, all the way through adolescence. Once a teen has reached 18 years old, the pediatric dentist is required to refer the patient to an practice of general dentistry.

What Makes a Good Pediatric Dentist?

It’s common for children to be nervous about going to the dentist, and it’s common for parents to be a little weary of who they let treat their child. That’s why today, HomeTown Dental is sharing the main traits that make up a good pediatric dentist.

Knowledgeable and Informative

When it comes to your child’s oral health, a good pediatric dentist should know the ins and outs of pediatric dental development. They should also be able to share their knowledge with you, the parent, to help you make sure that you’re doing all that you can for your child’s teeth.

Patience

How many kids do you know that will sit still while a dentist is poking around in their mouth? Those kids are somewhat few and far between, but that’s okay. A good pediatric dentist should be patient and be able to roll with the punches. Many kids will be nervous when they first go back to see the dentist, but as the appointment continues, they will usually start to settle down and become more relaxed. At HomeTown Dental, we do everything we can to ensure that your child starts the appointment on the right foot and stays calm and comfortable throughout the entire visit.

Communicative

One of the ways our pediatric dentist helps to keep the kids calm is to actually engage with them. Many pediatric dentists will only talk to the parents and won’t always initiate a conversation with the child. While it’s immensely important that your child’s dentist keeps an open line of communication with you, they should also be able to connect with your child. Making that connection can help to build rapport between the two and ultimately make for a more successful check-up.

Five Personality Traits Your Pediatric Dentist Should Have

A good pediatric dentist needs to have many qualities in order to make children feel safe and secure when they are at the dentist.

Going to the dentist can be a very scary thing. Even for adults, thoughts of going to the dentist can bring on feelings of fear, dread, anxiety, claustrophobia, and more. Taking this into consideration, it goes without saying that going to the dentist can be downright traumatic for children. Children are much more sensitive and prone to anxiety when it comes to being sat down in a chair and having a masked person stick loud tools into their mouth.

For this reason, a trusted pediatric dentist is absolutely essential when it comes to getting dental work done on children. Pediatric dentists need to possess a special list of qualities if they wish to thrive in their position. Let’s take a look at five personality traits your pediatric dentist should have.

A Love for Children

It goes without saying that your pediatric dentist should love children. Children are much different than adults and they require a certain amount of patience and understanding to effectively care for. Anybody who works with children needs to be kind and patient towards them.

Children may be underdeveloped in terms of mental capabilities, but one thing they can sense better than adults is if somebody likes them or not. If your pediatric dentist truly loves children, your child will be able to tell and will feel more comfortable around them.

Knowledgeable

All dentists need to be knowledgeable, however pediatric dentists need to be especially knowledgeable of children’s teeth. There are many different things pediatrics dentists need to look out for like signs of thumb sucking, pacifier use, and teeth grinding.

Kid Friendly Office

Normal dentist offices are boring and they might scare a child. A pediatric dentist needs to have an office that is decorated and colorful to make the children feel much more at home. They should have things like cartoons playing on a TV, toys, and decorations to take the child’s mind off of the dental work.

Educational

Children need to be educated on why it’s important to brush their teeth, how to brush their teeth, and what will happen if they don’t brush their teeth. A good pediatric dentist should be able to communicate all of this to your child in a way that isn’t boring and monotonous.

Authoritative

Although a pediatric dentist needs to be kind, they also need to be able to get children to cooperate. A good dentist will usually be able to get a child to cooperate with them, without having to boss them around or scare them.

Qualities of a Good Pediatric Dentist

Many dental offices advertise themselves as family dental clinics or even pediatric dental clinics, but that doesn’t actually mean they have a pediatric dentist. A pediatric dentist has a specialized education and desire to work with kids. Before you take your child to a dental clinic, be sure to ask if the dentist is a pediatric dentist. Once you arrive at the office, be on the lookout for these signs that you are in the right place for your child:

Atmosphere tailored for children – Atmosphere shouldn’t end with toys available in the waiting room. The set-up of the whole office should be designed to make children comfortable while giving them room to be kids. The main areas should be child-safe, so that there is no need to constantly hold your child in a death-grip to protect them from the office décor or vice-verse. The exam room, especially, should be a place that promotes comfort. It should be uncluttered and the dental chair easily approached by both children and their accompanying parent.

Child-sized supplies – Kids have smaller mouths – you probably noticed that, right? As much as they can, a pediatric dentist will make allowances for this size difference. For example, pediatric dentists should be able to make the x-ray process a comfortable one with child-sized film. Some pediatric dentists have gone one step further with a digital x-ray sensor that more accurately and painlessly takes the image of the child’s teeth.

Talks on the level appropriate for each child – A good pediatric dentist will be able to talk to children to help them understand what is happening. They will be mindful that young children might find the environment and tools a little intimidating. Talking to a child at the right level is a learned and practiced skill that every parent should expect of their child’s dentist.

Adjusts approach to fit the individual child – Every child is different, so It is important for a dentist to be flexible and accommodating. Not every girl likes princesses and not every boy likes pirates, but every child likes adults to talk at their level and show interest in them.

Respect, patience and care – Children need to feel respected and cared for by the dentist before they can trust them. A good pediatric dentist understands this! It might take a little more time, but it makes for a happier patient and a brighter dental future.

What’s the best way to make my child feel comfortable at the dentist?

While it’s important to get your child to the dentist early and often, this is obviously better accomplished if your child feels comfortable at the dentist’s office. Choosing the right dentist has a lot to do with that, but as a parent, there are other things you can do to put your child at ease.

Let him know that the appointment is coming up: Don’t wait until the day before the visit to tell your child that he has an appointment. Children react better when they are given time to mentally prepare.

Read dental-related kids’ books to put your child at ease: Check out the library or the Internet for resources that will help calm and even excite your child about taking care of his teeth and mouth.

Listen to his comments, questions, and concerns: Try to be as forthcoming as you can if your child expresses any worry about the appointment.

Try deep breathing techniques: Encourage your child to breathe slowly and deeply in order to calm their mind and body. This process works before and during the visit.

Emphasize the positive aspects of proper dental care: A childhood filled with quality, consistent dental care will provide a great foundation for your child’s ongoing dental health. Not only will it form good habits, but it will prevent the more serious issues he could have as an adult.

Role play through a dental visit: You won’t have all the supplies, but you can have fun going through some of the possible steps that will occur during a routine visit while having fun pretending with your child.

Hints From An Expert Deep Cleaning Company

How to Make Your Own House Cleaning Schedule

Planning is always the best part of doing anything. This is when you get to dream about the happiest path possible to reach your end goal – a home that is quick and easy to clean. But the house is not going to clean itself. So I do advise that you don’t treat planning like you’re writing a novel which needs editing.

Do it quickly!

Then start working even if you’re not finished with the schedule. For me the house cleaning schedule is the second phase of planning. It comes right after the making of checklists. So this should not take more than 30 minutes to complete.

However, if this is the first time you’re trying this out it may take a little longer. Making a schedule is one of the most difficult phases of the planning process. Failure to properly estimate the amount of time a cleaning task needs – can be demotivating. This is especially true when you don’t meet your goal or see and enjoy the impact of the effort you put in.

It all starts with your calendar. One that shows all the commitments you’ve made for your time. Now, we may have a tendency to treat cleaning as a low priority, but you should avoid that. Make it a priority. Meaning that if you put on your schedule that breakfast dishes should be cleaned and put away before leaving the house in the morning. Then do what you need to do in order to make that happen – even if it means waking up a little bit earlier.

Once you add the cleaning task to your calendar treat it like sacred time not to be usurped – unless there is an extreme emergency. Put your cleaning tasks in the timeslots when you will complete them. Although we do have a habit as human beings to under estimate the amount of time a task will take – there are steps we can follow to mitigate that issue

COVID busters: Just how deep is a deep clean?

Forget feather dusters and mops. Fogging machines, steamers and a special double wipe are the key weapons in the fight against the highly infectious coronavirus. Who deploys them and how is the work regulated?

Usually, they’re donning their hazmat gear to scrub down crime scenes or shuttered meth labs. But in recent months they’ve been lending their decontamination expertise to a new (and booming) market: coronavirus “deep cleans”.

This may well be the year of the big clean. As the pandemic rages around the world, offices, shops, hotels and homes are being wiped down like never before – sometimes three, four, even five times a day. Airlines have pulled out the kinds of chemicals usually reserved for nuking superbugs and herpes in a bid to keep passengers safe from the contagious new virus that causes COVID-19.

How does a deep clean kill the virus?

We live in a sea of viruses – most can’t hurt us – but right now we are on the hunt for one in particular. We can’t see it with the naked eye but when we breathe it out indoors it can build up in the air, and when we cough and sneeze it can shoot out in bigger viral balls known as droplets.

Sometimes it will stick to surfaces, surviving for hours or even days. It will eventually break down and die and it is still unclear how much of the virus you would need to ingest to fall sick – say, from touching a door handle and then touching your mouth or nose. Surface contamination is not considered the main way people catch COVID-19. Patients mostly seem to pick it up while in close proximity to someone who is infected, when the microbe is still lingering in the air or falling in droplets between them.

Housekeeping Guide for Deep Cleaning during Covid-19

hotels use cleaning products and protocols that are approved for use and effective against viruses, bacteria and other airborne and blood-borne pathogens. We are working with our vendors, distribution partners and suppliers to ensure an uninterrupted supply of materials.

Public Spaces and Communal Areas. The frequency of cleaning and sanitizing has been increased in all public spaces with an emphasis on frequent contact surfaces including, but not limited to, front desk check-in counters, elevators and elevator buttons, door handles, public bathrooms, stair handrails, gym equipment, dining surfaces and seating areas

Guest Rooms. Industry leading cleaning and sanitizing protocols are used to clean guest rooms, with particular attention paid to high-touch items including television remotes, toilet seats and handles, door and furniture handles and locksets, water faucet handles, telephones, light switches, temperature control panels, table tops and flooring.

Laundry. All bed linen and laundry will be changed daily and continue to be washed at a high temperature. Dirty linen will be bagged in the guest room to eliminate excess contact while being transported.

Back of the House. The frequency of cleaning and sanitizing will also increase in high traffic back of house areas with an emphasis on the employee dining rooms, employee entrances, uniform control rooms, employee restrooms, loading bays, offices, kitchens and security scanning areas.

COMMERCIAL DEEP CLEANING

The recent outbreak of COVID-19 has shaken the world and as a result, people have turned their attention to Deep cleaning, and we have thus experienced an increase in demand for our Commercial deep cleaning and deep cleaning disinfecting service.

Responsive cleaning specialists with particular expertise in Deep cleaning and believe that it is our duty to respond to the needs of our clients, especially during these unprecedented times. In response to the COVID-19 outbreak, we have developed a new ‘Coronavirus cleaning’ and Antiviral Sanitisation service, based on Public Health guidelines, in an effort to help reduce the risk of infection.

currently offering the following services;

Coronavirus Deep Cleaning & Virus decontamination

Fogging

Commercial Coronavirus Deep cleaning

Back to work Deep Cleaning & Workplace Antiviral Sanitisation

Welfare Deep Cleaning & Disinfecting

Construction site Deep Cleaning & Sanitisation

Office space Deep Cleaning & Disinfecting

Back to work’ Deep cleaning

Many workplaces have been closed for several weeks now, as many companies began initiating working from home policies even before the official lockdown had been announced. Concerns of the lasting impact of the Coronavirus on businesses and the wider economy are rife and more and more companies are eager to return to work. It therefore makes sense then, to begin planning for a return to work, as soon as is physically safe and possible. This will of course vary from industry to industry, depending on the nature of the works carried out. A critical step in the planning process for most workplaces will be the implementation of additional cleaning measures to ensure that the workplace is clean, safe and hygienic for its returning staff. It is important however that premises are not only given an initial thorough Deep clean, aka a ‘Back to work clean’, but that practices are in place to ensure regular maintenance is achieved.

Disinfection of all visible and accessible areas with fogging machine – this is the quickest solution and the cheapest, and also gives a fast turnaround meaning staff can return to work quicker. However, it is not as thorough as a deep clean. This is particularly recommended for large workplace premises.

Coronavirus Cleaning Guidelines

Enhanced routine for coronavirus cleaning guidelines Bear in mind that these cleaning guidelines for coronavirus are technical and most useful for professional decontamination cleaning companies. If you are a business in need of infection control services due to coronavirus contamination, or more general information relating to the services relevant to your business

Coronavirus cleaning guidelines

These guidelines are designed to help reduce the risk of spread of the novel coronavirus (COVID-19) from contact with contaminated surfaces. We recommend sites adopt enhanced cleaning processes, as it is recognized that our housekeeping procedures, whether provided by our colleagues or a vendor, may not be thorough enough to adequately reduce the risk of coronavirus transmission.

Site leaders are expected to discuss these guidelines with their cleaning services or company employees (as applicable) and ensure that they are immediately implemented

It is also recommended that site leaders (or designee) periodically observe the actual cleaning process to ensure proper implementation

Of primary concern for cleaning and disinfection, site leaders need to be aware of the occupancies and surfaces where frequent human contact might provide a reservoir for COVID-19. While each facility and operation will be different, the following areas should receive focused attention:

Areas of human congregation (including, but not limited to, offices, conference rooms, canteens/cafeterias, locker rooms and reception areas)

Hygiene facilities (including, but not limited to, lavatories/toilets, shower rooms, hand- washing stations)

Dispensaries (including, but not limited to, medical and first aid stations, emergency shower and eyewash stations).

Touch-point cleaning – what surfaces to clean:

​​Canteen tables and chairs

Crockery, trays and cutlery

Sinks, taps and kitchen areas

Toilets AND all surfaces within

Water fountains

Drinks dispensers

Vending machines

Lifts, their doors & buttons

Desktops and all work surfaces

Doorknobs and door handles​

​Light switches and dimmer switches

​Computer monitors, keyboards, mice

Tablets and laptops

​Telephone equipment

All chair rests and arms.

Coronavirus cleaning frequency

The areas highlighted above should be cleaned at least daily and, if possible, between shifts. Sites should use a commercial disinfecting wipe, detergent and water, or commercial anti-microbial products (see Disinfection section below for a list of likely effective cleaning solutions). The general guideline is that the more people who contact surfaces, the more frequently that surface should be cleaned.

Internal or external cleaning staff will be responsible for regular cleaning of common areas frequented by employees

Provide disposable wipes or other cleaning products identified in Table 1 (listed further below) so that commonly used surfaces can be wiped down by employees before each use.

Learn How To Get Rid Of Raccoons

How Do You Get Rid of Raccoons in The House?

Raccoons are intelligent creatures capable of living in many different environments and climates. This means, of course, they can easily adapt to living in your house. Raccoons can get inside through crevices or openings around attics, basements, or even inside walls. Once raccoons are inside, it can be difficult to get them to leave.

Why Do Raccoons Go Inside Your Home?

Raccoons like to go into houses because they make excellent food sources and den sites. The animals typically fight with one another over food and shelters because up to 15 and 25 raccoons can live within 1 square mile of one another.

Mother raccoons in particular enjoy houses because they are safe areas where they can have their babies. Raccoons avoid areas where humans frequently go, so they don’t nest in the living room or the kitchen. Instead, they will likely hide in low-traffic areas like attics and basements where they can sneak in and out with food.

What Do Raccoons Like to Eat?

Raccoons are omnivores, which means they eat meat and plants. Indeed, they will eat most things they can get their paws on, including bugs, fish, fruits, vegetables, and edibles from human trash bins like pizza crusts and crackers.

Does Raccoon Bait Work?

Raccoon bait is special, edible material designed to attract raccoons either to lure them into a trap or away from a certain area. It can be a liquid, paste, or kibble. Most are not poisonous and are highly effective in attracting raccoons through the use of scents like anise or animal musk. Raccoons, though very intelligent animals, can’t resist the scent of a gourmet meal and will normally dive headfirst into a delicious-smelling bait that’s set out for them.

How To Get Rid of Raccoons

Raccoons—the garbage-eaters we love to hate—are adorable from afar but problematic up close. These nuisance animals are universally recognized by their bandit-like faces and mischievous squeaks, but for those who don’t know, raccoons are small mammals that can grow up to 23 pounds.

Found ransacking trash piles throughout the United States, these scavengers enjoy a variety of environments. Right off the bat, most people recognize these little guys by their distinctive gray coat and black facial markings.

A raccoon usually lives for 2-3 years and can make a den almost anywhere. Unfortunately, these freewheeling creatures are opportunistic and love being around humans, who provide tons of food. This means that they’ll invade your backyard without a second thought, burrowing in your garden and nesting on your property in order to eat your scraps.

Where Do Raccoons Live?

Raccoons can live in almost every environment in the United States except the hot southwest and northern mountains. Colloquially called “trash pandas,” they are dumpster divers capable of living in urban regions like cities and neighborhoods. Many also enjoy the countryside where they can find crops, eggs, and even young chicks for food.

They are omnivores, which means they feast on a diet of both meat and plants. These hungry creatures love berries, eggs, rodents, frogs, fish, vegetables, and many other natural foods. When in urban areas, they will dig through the trash and eat things like pizza, cheese, vegetable peelings, and any other human food they find.

Raccoons

Raccoon behaviour

Raccoons are hefty omnivores: larger males can weigh up to 28 kg. These mammals adapt well to urban areas, because they eat just about anything: worms, spiders, frogs, eggs, fruit, nuts, corn… And they aren’t at all shy about going through garbage to get their paws on a meal.

Raccoons retire to their dens for the winter around mid-November. Males leave the den in late January; females follow in mid-March. They sometimes use spaces under porches, garden sheds and similar structures as living quarters. And since they are excellent climbers, they’re also attracted to hollow trees and roof structures. Raccoons are born in the spring and spend the next three seasons with their mother.

Are raccoons useful or bothersome?

A raccoon’s diet includes small rodents and insect pests.

Raccoons wreak havoc in garbage.

They lurk around homes and can become aggressive if you get in their way.

Like skunks, they can do damage to lawns while digging for white grubs.

Raccoons can get into attics, disturbing insulation and leaving droppings behind.

Raccoons can carry rabies. Keep your distance, especially if you come across one that doesn’t seem at all timid. Stay out of its reach and, ideally, make sure you have somewhere you can retreat to in case of danger

Tips for keeping raccoons away from your home

1. Keeping raccoons off your lawn and out of your garden

Make sure your lawn is treated for white grubs, to deprive raccoons of this source of food.

2. Keeping raccoons away from your garbage

Use a garbage can with a lid that is difficult to remove, or leave garbage bags in a bin equipped with a hinged lid that locks.

Clean the can and bin often to eliminate “attractive” odours.

Another strategy is to wait until the morning on garbage day to take out the garbage.

3. Keeping raccoons away from your house, shed or garage

Trim back any branches that could help a raccoon get at your house.

Make sure your roof soffits are secured, and screw metal screens over roof vent and chimney openings.

Block off any routes leading underneath the porch, deck or shed (using chicken wire, sheets of tin or cement). First make sure no adult or young raccoons are already inside.

How to trap a raccoon?

If, despite your efforts to deter them, raccoons (or other animals) are causing damage to your property, you can consider capturing and relocating them. You should know, however, that “evicting” a raccoon is no easy task—it’s even a dangerous one

Getting Rid of Raccoons

Many people think they can easily get rid of a raccoon once it’s nested in their attic or chimney. So, they use common sense approaches to getting rid of raccoons. For example: playing loud music where you think they may be. They like a peaceful and quiet environment. So, playing loud music can help make the raccoons leave.

But, these methods have their own drawbacks. Namely, raccoons running further into your house, or neighbors grumbling about the loud music at all hours

The safest technique to get rid of raccoons for good is to get in touch with a certified specialist to take care of your raccoon problem. Removal’s professional removal experts are trained to humanely catch and remove the troublesome raccoon from houses and attics.

How Do I Know If I Have A Raccoon Problem?

Just seeing a raccoon is not a sign of an issue. However, if you see a raccoon continuously or in combination with a scratching sound in your attic at night, in your crawlspace, or see noticeable damage such as missing siding, debris, insulation, uncommon smells, family pets showing signs of attack, and so on.

If they stick around they continue to cause carnage. In addition to raiding trash bins, they consume pet food (often entering into homes through dog or cat doors!), consume bird food out of your bird feeders, and destroy lawns going after beetle grubs and earthworms.

Getting raccoons out

Before evicting raccoons from your house, you need to figure out how they’re entering (that is, if you don’t want them coming right back in). Give your house a thorough inspection to find areas where raccoons could get in by viewing your house from the perspective of an animal looking for a den.

Is there anybody in there?

To determine if an opening is being used, block the hole loosely with wadded newspaper. Leave in place for two to three days. If the newspaper goes undisturbed, and the weather has not been particularly cold or stormy, no one is using it as an entryway. If the newspaper is pushed out of place, someone has moved in.

Raccoon tenants

Once you know how they’re getting in, find out if your unwanted guests happen to be a mother raccoon with young. If so, the best thing to do is wait a few weeks until the babies grow old enough to leave with their mother—they won’t survive without her. Don’t try to trap and relocate the family yourself. It almost always leads to separation (and probably death) of the young raccoons, unless done by a professional who knows how to reunite mothers with their offspring. The reunion approach allows the mother move her young to another den site at her own pace.

One-way doors

Some professionals use a “one-way door” to get raccoons out of attics or crawl spaces. Once the animals have left, they’re unable to get back inside. Use of these doors is best left to professionals, who can make sure that mothers are not isolated from their litters. The young must be old enough and mobile enough to exit through the one-way door with their mother, and this can be very hard to assess.

Humane harassment to get them out

If you know that you are dealing solely with adults, you can start using humane techniques to get them to leave on their own.

Start small. Gentle techniques may be all you need. Try bright lights, loud noises (set a loud battery-operated radio in the attic or in the fireplace), and unpleasant smells (try a bowl of cider vinegar at the base of the chimney).

Combine techniques. Multisensory harassment works best: light, noise, and smell.

Choose the right time—at dusk, right before the mother’s normal activity period. Don’t drive raccoons out during the day. Raccoons are primarily nocturnal, so they may be confused in daylight, and they are certainly more vulnerable.